
Introduction
GitHub Actions is an automation tool that helps developers design their workflows by automating tasks, allowing the implementation of CI/CD directly from within the Github repositories.
Security is essential when managing production applications to protect data, prevent unauthorized access, and maintain the application integrity, integrating image scanning into the CI/CD process is not just beneficial but essential to ensure the readiness of your applications for production
In this article, I will cover how to implement CI/CD workflows using GitHub Actions, including building and testing an app, creating the image, and performing image scanning before creating a production image on a registry. This will encompass handling interdependencies and using a Marketplace Golang template.
The Basics of Github Actions
To get started with GitHub Actions, you can follow these initial steps:
- Create a GitHub Repository: If you haven’t done so already, create a new repository on GitHub or navigate to an existing one.
- Navigate to the Actions Tab: Once you’re in the repository, click on the “Actions” tab at the top of the page. This will take you to the GitHub Actions dashboard.
- Choose a Workflow Template: GitHub provides a variety of workflow templates to help you automate common development tasks. You can select a template that suits your needs or create a new workflow from scratch. To choose a template, click on “Set up a workflow yourself” or select one from the provided options.
- Configure the Workflow: After selecting a template or creating a new workflow, a YAML file will open in the editor. This file defines the steps and actions to be executed in the workflow. Customize the workflow by modifying the YAML file according to your requirements. You can specify triggers, define steps, and configure actions to perform specific tasks.
- Monitor Workflow Runs: You can monitor the status and progress of your workflows in the Actions tab. It will display details about each workflow run, such as the status, duration, and logs. This helps you track the execution of your workflows and identify any issues that may arise.
The workflow template will help create a boilerplate for the YAML files needed to address various topics, such as deploying on Azure, ECS, testing, and building with Golang, among many others
Each YAML file found under .github/workflows will create an independent workflow, or you can use a single one with dependencies between them. Each method has advantages and disadvantages, depending on your needs. For this post, I will be using the example-app repository, which contains a sample web server built with Golang and a Dockerfile to build the container
Single or Multiple Files: How to Choose the Right Approach for Your Needs
When using GitHub Actions, you can either organize your workflows in a single file with multiple jobs and actions or split them into multiple files.
The single file approach keeps all workflow definitions in one file, making it simpler to manage and understand. This is ideal for smaller projects with fewer workflows. It is also good for starter developers or organizations willing to test or build initial phase of projects.
The multiple files approach allows you to break down workflows into separate files, offering modularity and reusability. This is useful for larger projects with complex workflows or multiple teams collaborating. In a real world environment, this approach are used to leverage modularity and reusability it is also help to manage across large organization
Choose the approach that suits your project’s size and complexity, as well as your team’s collaboration preferences.
The Workflow
The workflow consists of four jobs: ‘test-code’, ‘build-and-push’, ‘compliance’, and ‘push-to-prod’. Here, you can find the repository and the files I am using for this laboratory.
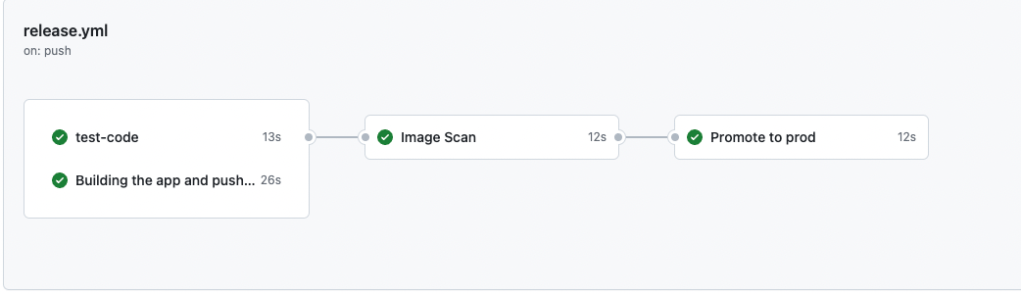
- Test-code: Evaluates the code and performs Golang tests on the server to ensure everything works as expected.
- Building the App and Push: Builds the image to containerize the application based on the provided Dockerfile, then pushes it to the registry tagged as <github.sha>-dev.
- Image Scan: Goes through the image, performing the required scans to prevent the use of vulnerable images.
- Promote to Prod: Uses the previously scanned image, then tags it as prod and pushes it to the registry.
GitHub Actions is flexible, allowing you to organize workflows as you see fit. Each file under .github/workflows will be interpreted as a separate workflow. For this tutorial, I will simplify the process by using a single file with multiple jobs
Tree hierarchy
.github
└── workflows
    └── release.yml
In the repository, under the Actions tab, you will see the job defined like this.
Workflows File
The files under .github/workflows are YAML files that define the workflows to be executed in blocks. The initial section indicates the event that triggers the action; in this case, it’s triggered every time a new push to the main branch is detected.
name: Release app
on:
  push:
    branches:
      - main
In the jobs section, I defined the name of each job, the runner on which it will run, and the actions that it will perform.
- Set up Go: Uses the Marketplace Golang template to prepare the machine for running Golang software.
- Check out Code: Retrieves the code onto the machine.
- Test the App: Runs the app through the tests available in the repository.
jobs:
  test-code:
    runs-on: ubuntu-latest
    steps:
      - name: Set up Go
        uses: actions/setup-go@v4

      - name: Check out code
        uses: actions/checkout@v3

      - name: Test the app
        run: go test -v ./...
Every action under the steps section is performed on an Ubuntu-latest machine. There are other GitHub-hosted runners available, or you can use your own. Once the application has been successfully tested, it is time to build and push.
      - name: Build Image
        id: build-image
        uses: redhat-actions/buildah-build@v2
        with:
          image: ${{ env.APP_NAME }}
          tags: dev-${{ github.sha }}
          containerfiles: |
            ./Dockerfile

      - name: Push To Registry
        uses: redhat-actions/push-to-registry@v2
        with:
          image: ${{ steps.build-image.outputs.image }}
          tags: dev-${{ github.sha }}
          registry: ${{ env.REGISTRY }}/${{ env.ORG }}
          username: ${{ secrets.DOCKER_HUB_USERNAME }}
          password: ${{ secrets.DOCKER_HUB_PASSWORD }}
There are several actions in the Marketplace to consider. In the above example, it uses Buildah to build the application and Podman to push it to the registry with the tag ‘dev-${{ github.sha }}’, ready for scanning.
  compliance:
    name: Image Scan
    needs: [test-code, build-and-push]
    runs-on: ubuntu-latest
    steps:
      - name: Check out code
        uses: actions/checkout@v3

      - name: Run Image Scan
        uses: aquasecurity/trivy-action@0.15.0
        with:
          image-ref: '${{ env.REGISTRY }}/${{ env.ORG }}/${{ env.APP_NAME }}:dev-${{ github.sha }}'
          severity: 'CRITICAL'
As shown above, multiple action providers can be utilized to harness the best of each one. Aqua Security supports trivy-actions to integrate and implement image scanning in your GitHub Actions workflows. The scan will fail if it finds a critical vulnerability in the image.
This example also serves to introduce the ‘needs’ clause. It is used to create dependencies between jobs; the image scan cannot run if the code test or image building is still in progress. It will wait until the jobs specified in the ‘needs’ clause are completed.
If everything goes well, it is then time to promote to production.
      - name: Push to Prod
        uses: redhat-actions/push-to-registry@v2
        with:
          image: ${{ env.ORG }}/${{ env.APP_NAME }}
          tags: prod-${{ github.sha }}
          registry: ${{ env.REGISTRY }}
          username: ${{ secrets.DOCKER_HUB_USERNAME }}
          password: ${{ secrets.DOCKER_HUB_PASSWORD }}
Managing Secrets
Like any other CI/CD tool, it is not expected for secrets or sensitive environment variables to be stored in plain text in the workflow files. Secrets can be accessed by prefixing ‘secrets.’ to the variable, as previously shown for the Docker login username and password. To create a secret, go to the repository settings.
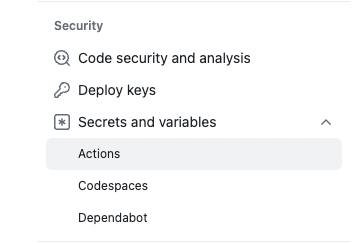
Then create the secret

Secrets can now be accesed using the following format:
password: ${{ secrets.DOCKER_HUB_PASSWORD }}
Executing the workflow
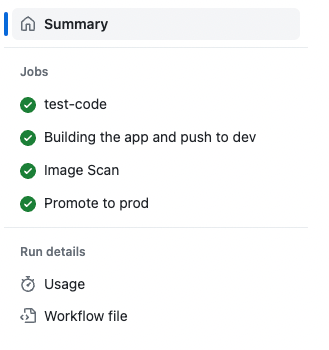
From the moment you push the .github/workflow/release.yml file into the repository, every new push against the main branch will trigger the entire workflow. You can check the results or follow the process by going to the Actions tab and reviewing the name of the merged or pushed commit.

Given the dependencies created, the test-code and build-and-push steps will be executed independently and in parallel. This is an important consideration when evaluating the performance of large deployments or extensive lifecycles. You can check the result of each step; for example, the Image Scan.
2023-12-08T02:15:06.904Z	INFO	Detected OS: alpine
2023-12-08T02:15:06.904Z	WARN	This OS version is not on the EOL list: alpine 3.19
2023-12-08T02:15:06.904Z	INFO	Detecting Alpine vulnerabilities...
2023-12-08T02:15:06.905Z	INFO	Number of language-specific files: 0
By the end of the execution, the code is tested, the image is built, and the security scan performed. Both images should then be available in the registry.

Conclusion and Key Takeaways
In summary, GitHub Actions is a powerful tool for automating workflows in software development. With its versatile features and easy integration, you can create their processes and improve efficiency.
By the integration of GitHub Actions, you can automate tasks, run tests, build and deploy applications, and more. Overall, GitHub Actions is a valuable asset for modern development practices.
- GitHub Actions automates tasks through the workflows.
- Workflows can be organized in a single or multiple files.
- Leverage actions by the usage of the Actions Marketplace.
- Organize jobs using the ‘needs’ clause.
- Securely manage sensitive data with secrets.
- Integrate different stages of SDLC and implement CI/CD in a secure and effective manner.
REFS:
Github Actions docs: https://docs.github.com/en/actions
Example app repository: https://github.com/gmontalvoy/example-app.git
Actions Marketplace: https://github.com/marketplace?type=actions
